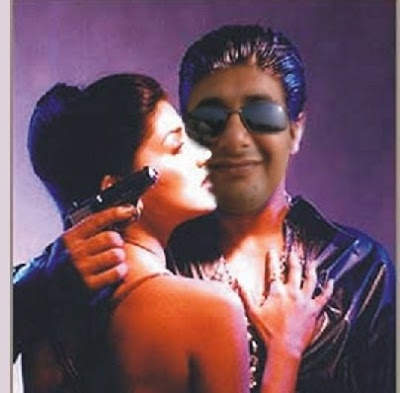
Our Blakut Team member Mac is Back has made this excellent tutorial on editing through Corel Photo-paint. With the help of this tutorial you will be able to embed your face [well or anyones ] on anything you want. Its quite simple but effective.
Normally Image editors cut the face and merge it with other but sometimes face was not matched, and it clearly shown that the edit, for good editing quality we should follow this tutorial! Here is what you need to do-
Firstly we preassume that you have Corel Photo-paint on your PC. If not then grab one for you from these warez sites given on Blakut previously. Now that you have everything on your hand lets start for now.
STEP-1: Opening the Pictures on Corel Photopaint:
 Voila! Its MAC on the photo!
 .... Quite effective isnt it! Please do leave a comment telling us how like this! And for any help you can goto this thread of our DFS community to directly ask Mac
Some Tips in between your work:
~~The End~~
- We can use any picture of our choice. For this tutorial we are using these two pictures
- PIC-1 : My own picture

- PIC:2 - Picture to be edited

- Now open both the pictures on Corel Photopaint. This will open them up on several tabbed windows.

- Cutting down the face is an easier method but not at all recommended. Besides if we do masking then things will be much professional and original type and its quiet easy too.
- Select MASK TOOL from mostly left side of the toolbar for masking on Image or click and hold 2 second on mask tool for different types of masks.
- Select third FREEHAND MASK TOOL

- Decide yourself which part of picture u want to mask. You can ADD or SUBSTRACT mask with CTRL and SHIFT key like these

- Ones you satisfied with your mask, (I mean see the shahrook’s face completely cover with the mask) press DELETE KEY.

- Now Image is like above picture, Select whole PIC with RECTANGLE MASK TOOL, and press CTRL + UPARROW (Create an Object),
- Open Object docker from MENUBAR > WINDOW > DOCKERS > OBJECTS (CTRL + F7). Find a Background in Object Docker. Select Background and delete it.

- Now open the PIC - 1 (My pic), Select the whole picture with RECTANGLE MASK TOOL, now press CTRL + UPARROW KEY or select MENU BAR – OBJECT > CREATE > OBJECT COPY SELECTION…

- Now you can see that the selection part is as a new object. Press CTRL + C (copy to clipboard), Open PIC – 2 (MENUBAR -> WINDOW) and press CTRL + V (paste) it; you can scale the image at your choice.

- Choose a MAGIC WAND MASK TOOL n just click on white area (Shahrook’s face), you can see that whole white area covered with mask, press DELETE KEY to delete it. Like this…

- Now select the PIC - 1 ( MY pic), you have to send that pic behind PIC - 2 (Shahrook’s pic) so follow this step MENU BAR - OBJECT > ARRENGE > ORDER > BACK ONE (CTRL + PGDWN) It’ll look something like this

- Now scale and adjust PIC - 1 (MY pic) as you like
- Select PIC – 2 (shahruk’s pic) and goto MENUBAR – OBJECT > FEATHER (CTRL + SHIFT + F) (feather it with 5 or 10), your pic’s border area will be semi transparent after feather. So both pics will automatically match with each other.
 Voila! Its MAC on the photo!
- You can switch between two windows, follow these steps: -
- MENU BAR – Window > File 1/ File 2
- Rollover and Roll down your mouse roller for zoom in and zoom out, you can do your work pixel to pixel.
- With “ADJUST Menu” you can adjust color, brightness, intensity, contrast etc…..
- If this simple work is not simple for you, you can use EFFECT Menu for different creativity n destroy the Image.
- Every time u you make a mistake hit Ctrl + Z (undo)(After more practice you will less use undo)
- This thing can be a part of game, prank etc..... so totally for fun nothing serious....
- Don't used this to make an offensive and dirty image....
- Have sportsman spirit and enjoy editing in Image and have fun....
RATE IT: (1) Sucks (2) Stupid (3) Kewl (4) Rad (5) Wicked
